This tab allows users for setup.
Users may move teeth as desired.
Layer function allows users to stage the setup as well.
New Setup
Function to create new setup. User may create different setups at same time.
1. Occ Plane
: Step to adjust the occlusal plane.
Use 3 control bars to set the plane position.
2. Arch
: User sets target arch of the setup. ※ Arch is equal to line of occlusion.
Arch is adjusted by 2 control points to move and rotate.
Select type of the Arch.
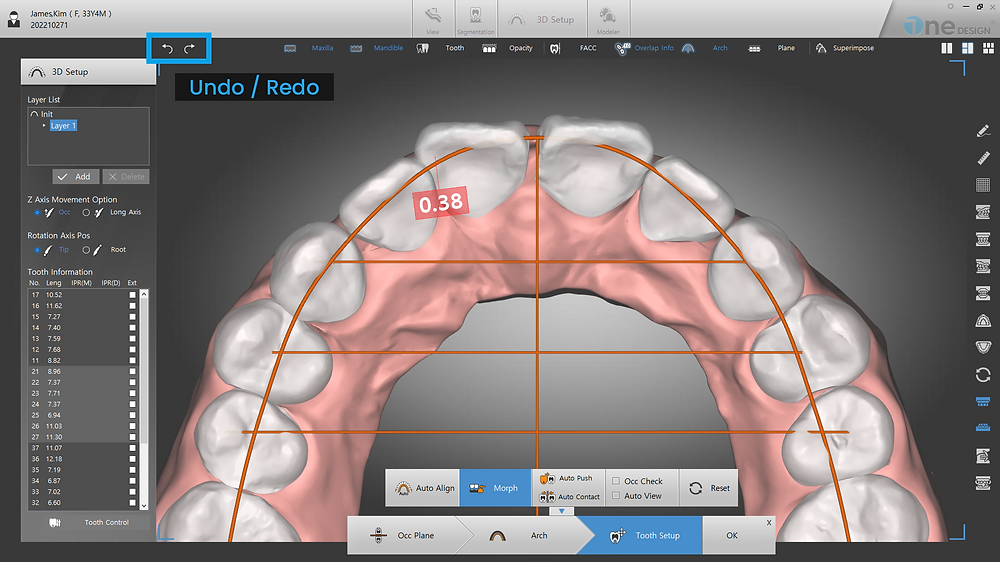
3. Tooth Setup
: This step is to set the position and properties of the teeth. ※Properties: IPR, Extraction, Fix
Movement and rotation of the teeth. ※ Adjust the controls displayed when a tooth is selected.
The position of a tooth can be adjusted with tooth control dialogue. ※ The tooth control button is at the bottom of the left tool bar.
4. IPR
: Choose a tooth and right click to select between IPR (Mesial) and IPR (Distal).
User may undo their IPR by right click and select Reset (Mesial) and Reset (Distal).
5. Auto Align
: Function that automatically aligns all teeth based on the occlusal plane and arch.
6. Auto Push
: Function that automatically push away neighboring tooth when moved.
7. Auto Contact
: Function that automatically prevents all overlaps with neighboring teeth.
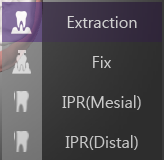
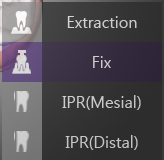
8. Extration / Fix
: Function to extract or fix teeth.
Select a tooth and right click to open Extraction / Fix menu.
Undo extraction: Untick the Ext under the tooth. information table on the left.
9. Occ Check
: Displays contacted area of both Mx and Md with colormap.
10. Auto-View
: Click any tooth to change automatically the camera view to front view of the selected tooth.
11. Left Tool bar
Z-axis movement option: Adjust the way to move Z-axis. ※ Perpendicular to the occlusal plane or in the root direction.
Rotation option: Adjust the rotational axis. ※ Rotation based on tip or root.
Tooth information list: Displays length of each tooth, amount of IPR and extractions.
12. Undo / Redo
: Undo / Redo any movement and IPR.
Click Undo / Redo button on top left corner.
Tip 1: How to Setup quickly
: Apply rotation of all teeth based on the arch in the occlusal plane view and activate Auto Push to automatically align the teeth Fine tune with tip/torque, intrusion-extrusion.
Tip 2: How to move / rotate teeth
without rotating the screen
: Move rotation / mesial-distal / lingual – buccal in occlusal plane view and open Tooth Control menu to control Torque / Tip / Intrusion-Extrusion.
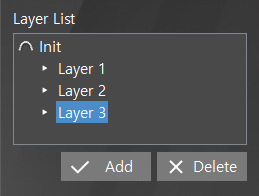
13. Layer
: Function to add Layers.
Layer : Milestone for movements to reach final Setup. User may create multiple layers.
General clear aligner production requires layers in order of Expansion > Alignment > Retraction.
Add
Add a new Layer.
Select Init and click Add to change current layer 1 to layer 2, and copy of Init will become new layer 1.
Select any Layer, and click Add to copy selected Layer.
Delete
Delete selected Layer.
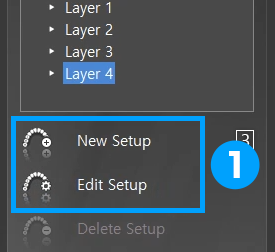
Change Layer Name
On the 3D Setup Tap, select New Setup or Edit Setup to go to the Setup screen.
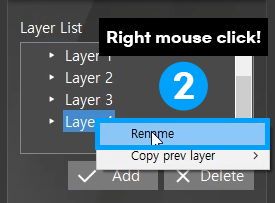
Right-click the layer you want to rename to display the Hidden menu.
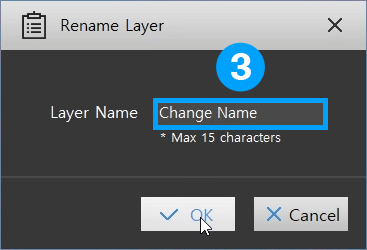
Choose Rename to change the Layer name.
14. Superimpose
: It is a function that can overlap teeth before and after treatment.
Use the slider bar to adjust the transparency.
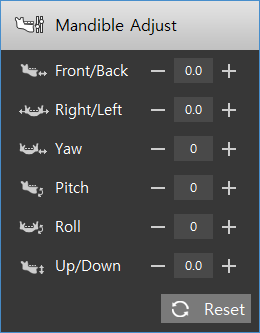
15. Bone Adjust
: It’s a function that moves the mandible.
You can adjust the position of the mandible using the Mandible Adjust dialog.
Moving the mandible does not affect the amount of tooth movement.
The Mandible Adjust applies equally to all layers. In other words, you cannot set the Mandible Adjust for Layer 1 and Layer 2 differently.
16. Pontic
: Virtual tooth that replaces the location of the tooth extracted during orthodontics.
Using the auxiliary toolbar, you can add or delete pontic and set the size of the pontic.
You can export including the pontic. ( Selectable from Export Options )
You can adjust the size and position of the pontic for each layer
: In the modeler, the size and position are automatically adjusted based on each step.
You can export including the pontic. ( Selectable from Export Options )
: In the modeler, the size and position are automatically adjusted based on each step.
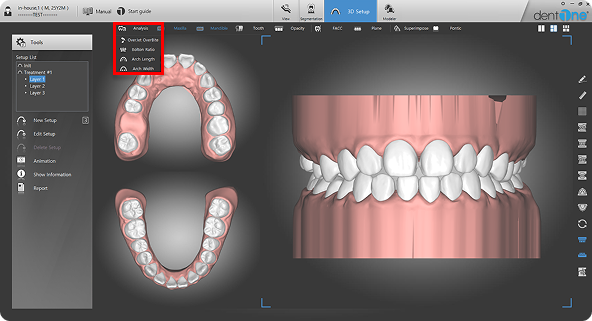
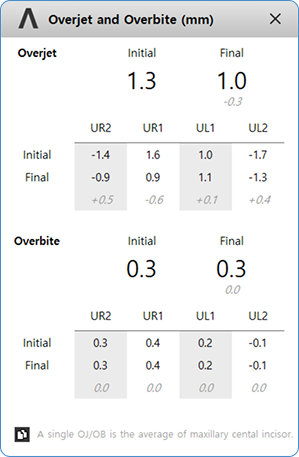
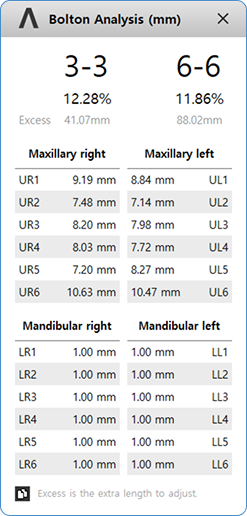
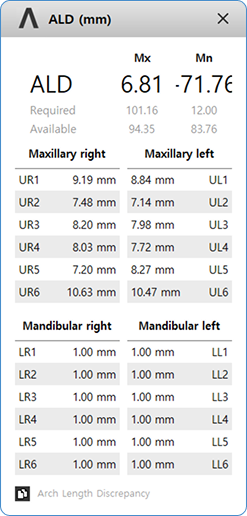
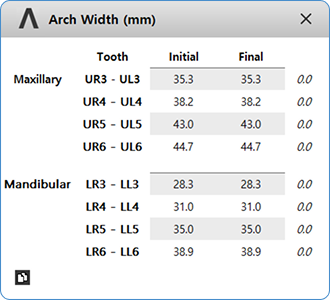
17. Analysis
: Displays analysis information.
The button is enabled in the View mode, New Setup, and Edit Setup modes of the 3D Setup tab.
View mode
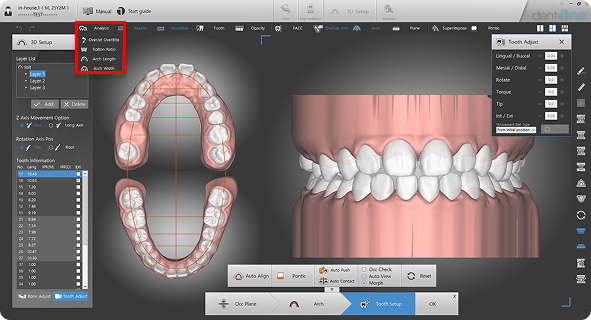
New Setup/ Edit Setup mode
While adjusting the tooth position, the analysis is updated in real time as the tooth moves.
Copy Analysis Results: Click the
button at the botton left of the dialog to copy the results to the clipboard. You can then paste it into Excel using CTRL+V.
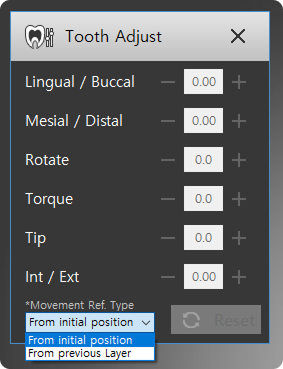
18. Tooth Adjust
: This feature shows the amount of tooth movement.
You can set the reference starting position when calculating tooth movement.
From init: Movement distance from the initial position to the current position
From previous Layer: Movement distance from the previous layer to the current position
Edit / Delete Setup
Function to edit / delete selected Setup.
Animation
Displays 3D animation from initial to final layer of the Setup.
Animation can be saved as a movie.
Show Information
Function to display all teeth movement (Mesial/Distal, Lingual/Buccal, Intrusion/Extrusion, Rotation, Torque, Tip).
Report
Function to save the result of the Setup in images, movement amount and bolton ratio in PDF.