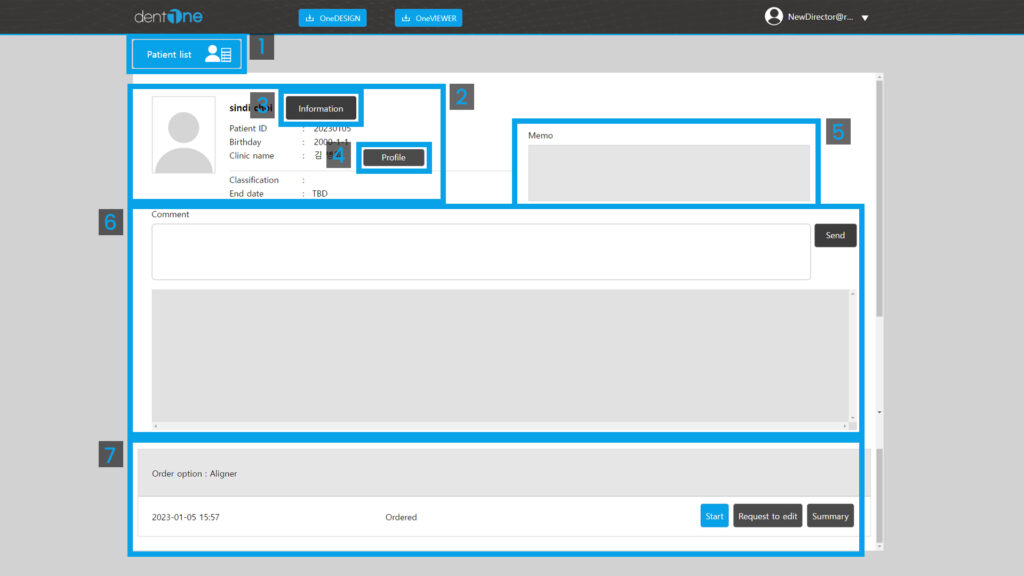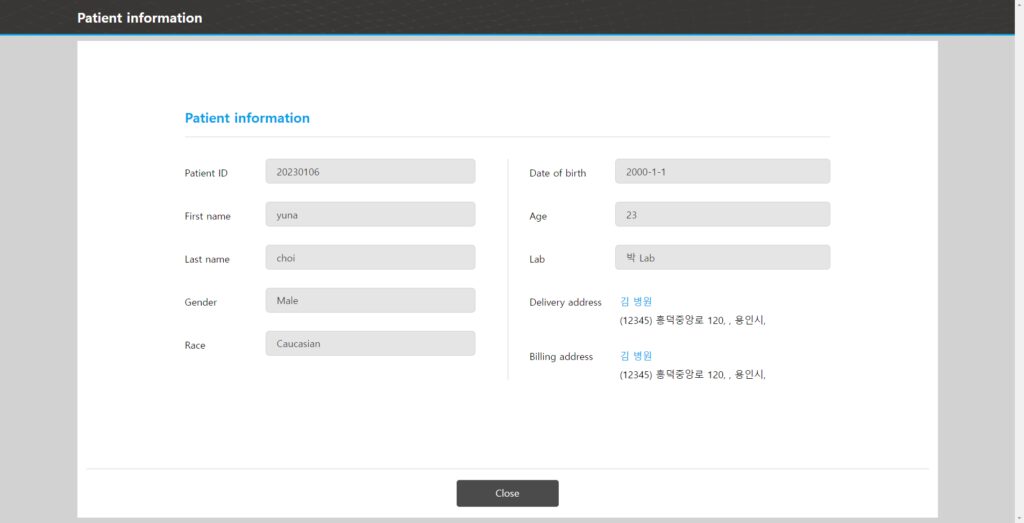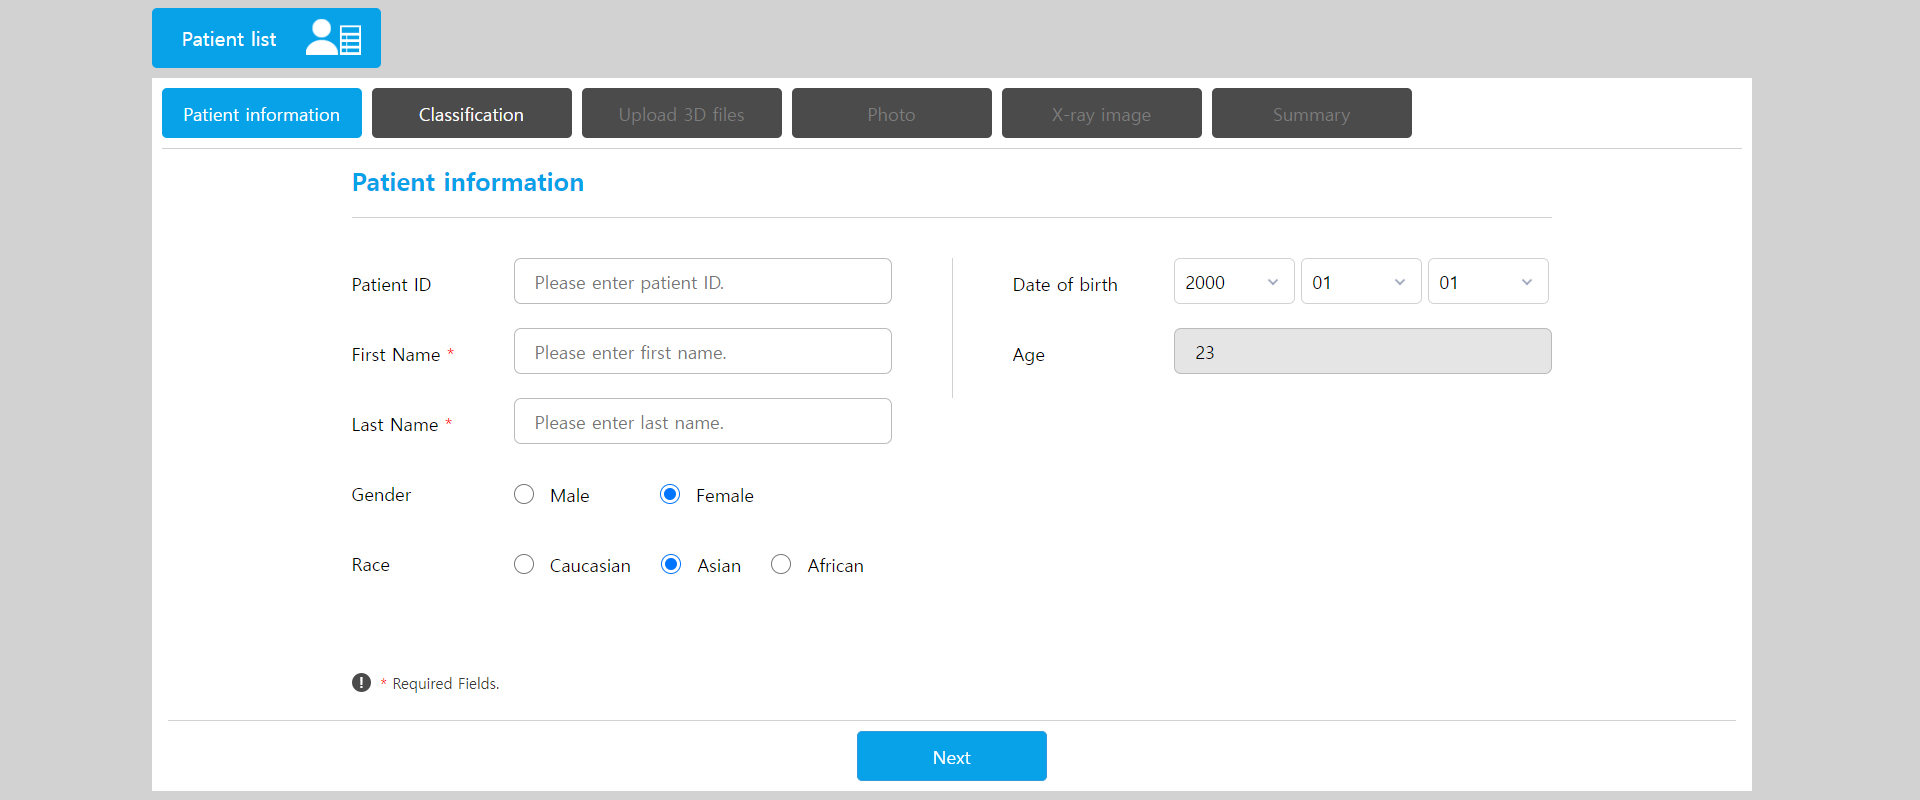
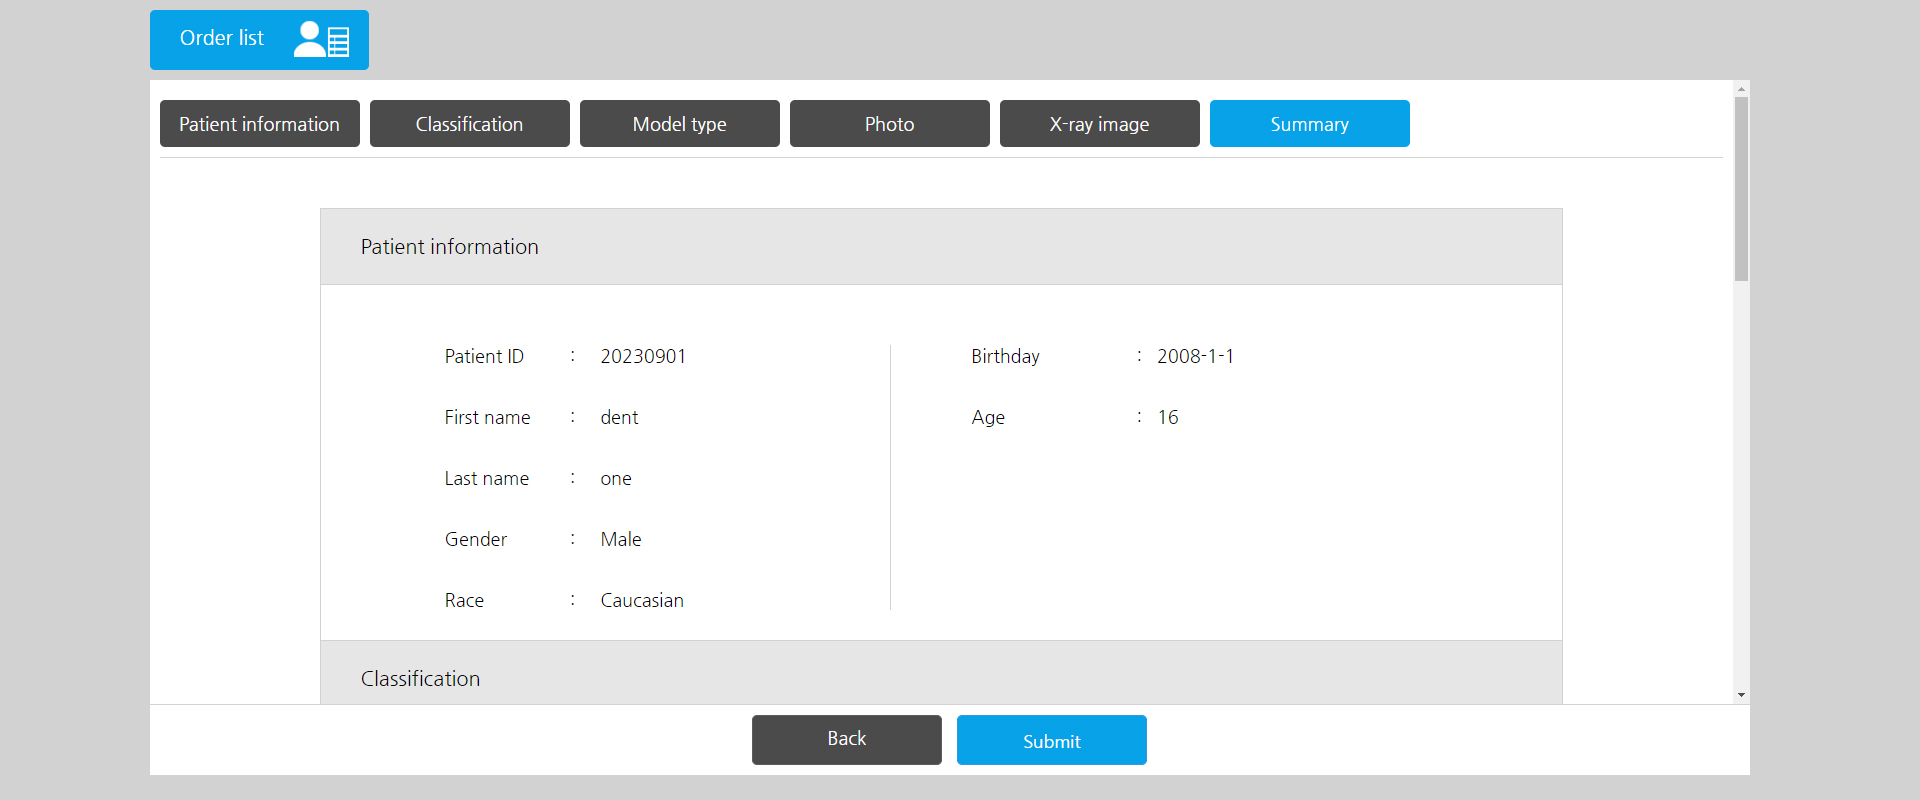
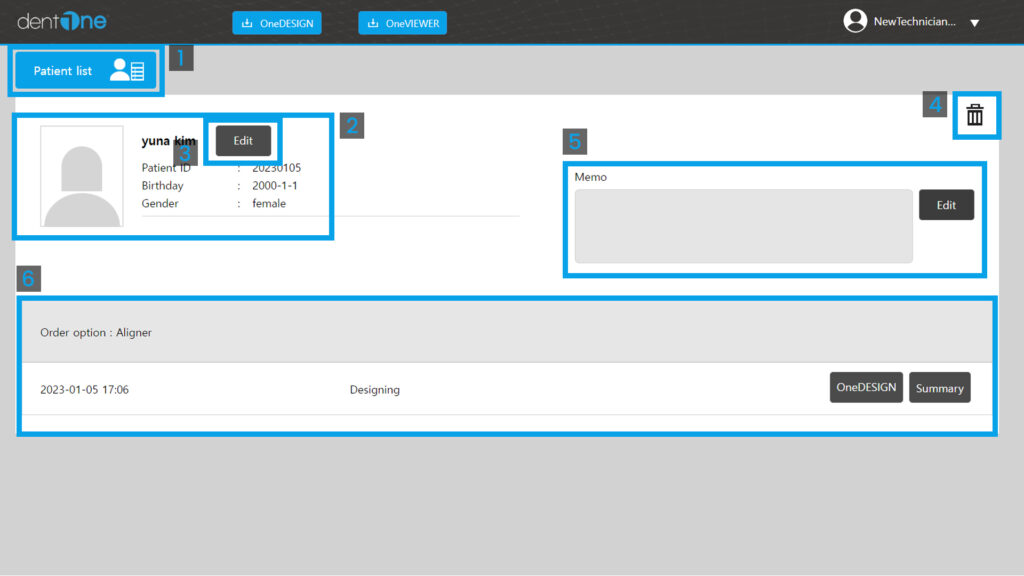
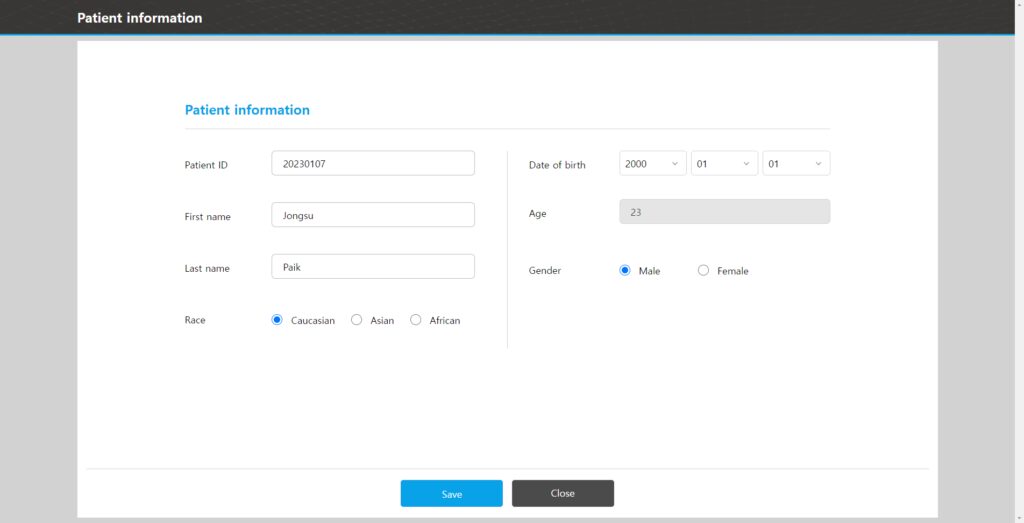
1. 환자 정보
※ First Name, Last Name 필수 입력 항목.
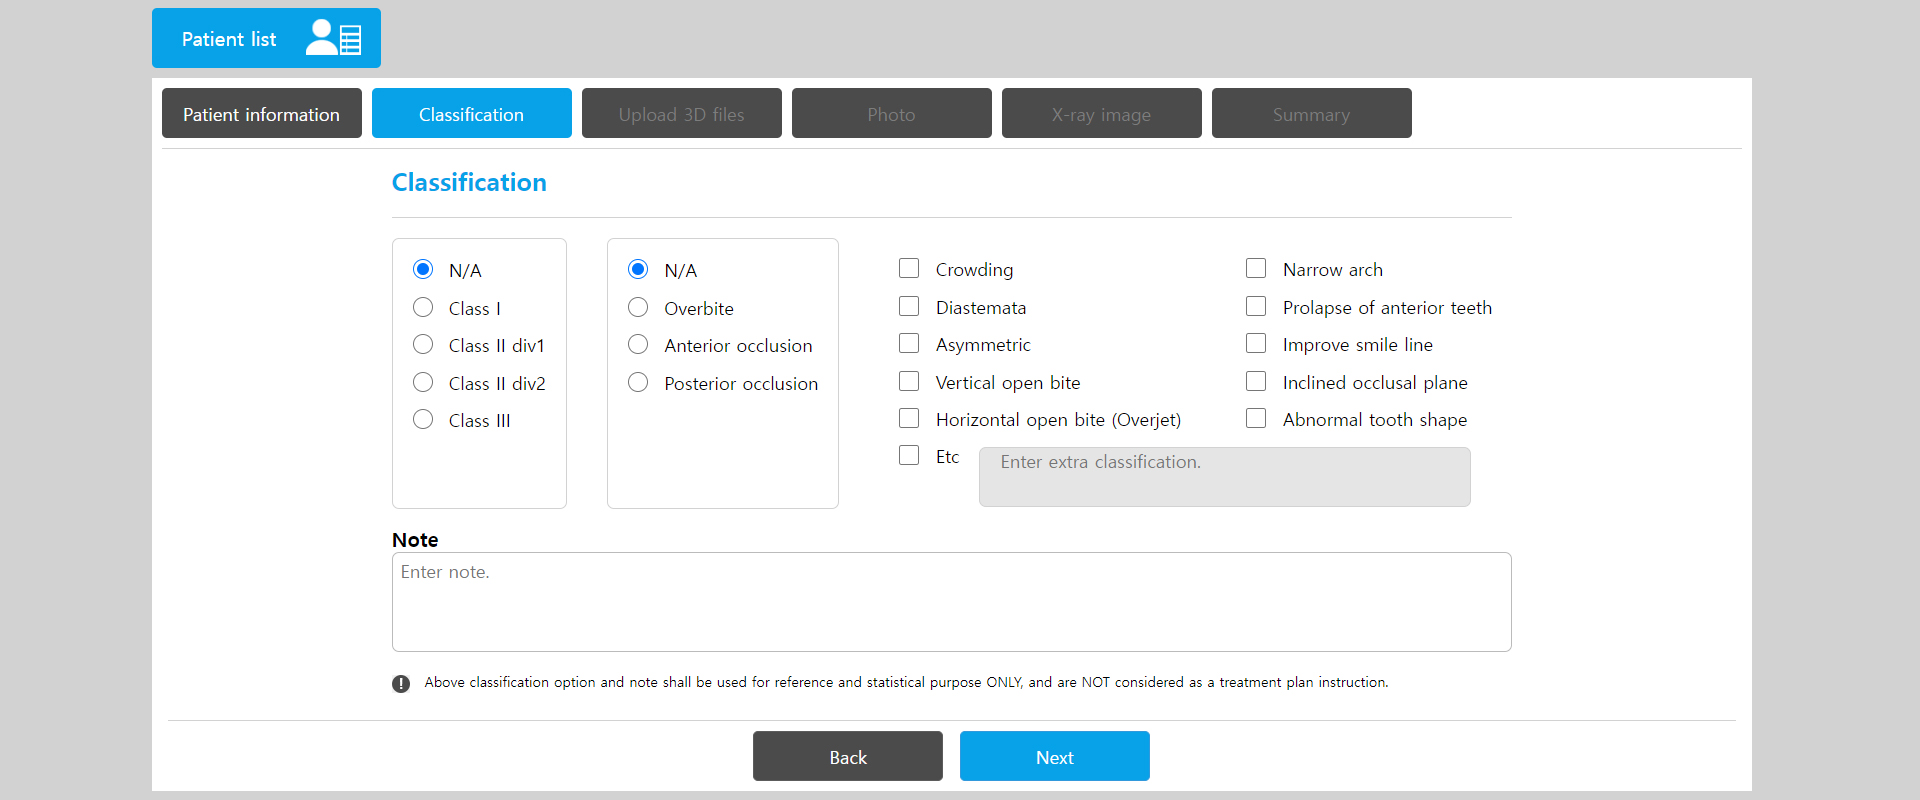
2. 유형
※ 필수 입력 항목은 아닙니다.
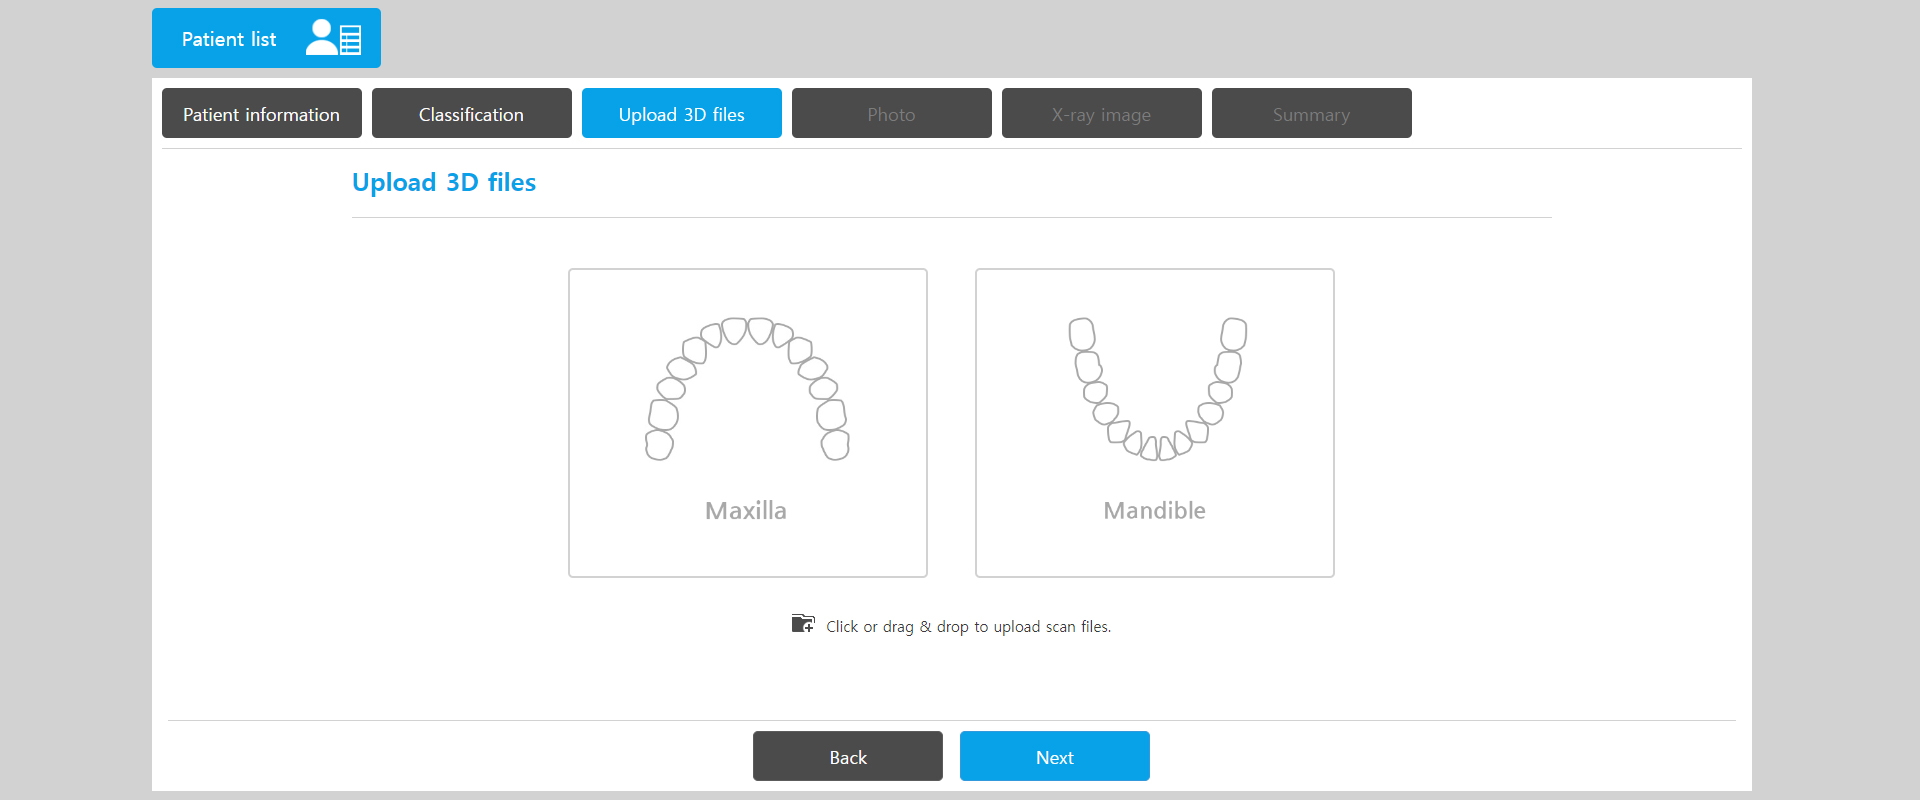
3. 모텔 타입
※ stl, obj, and ply 형식만 업로드 가능.
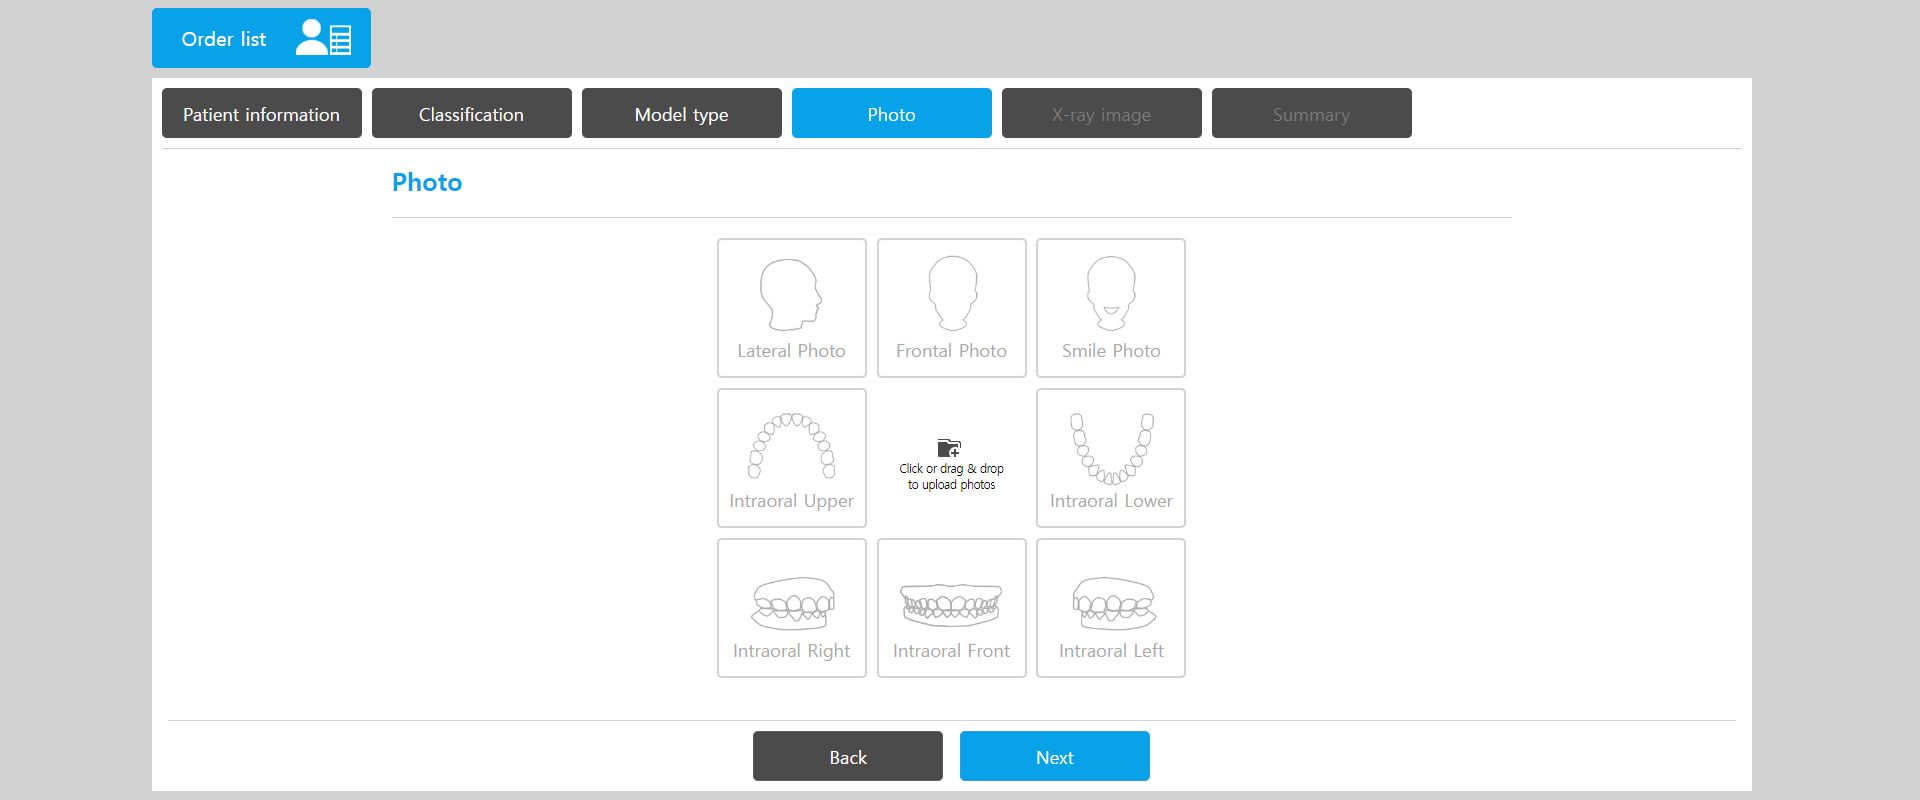
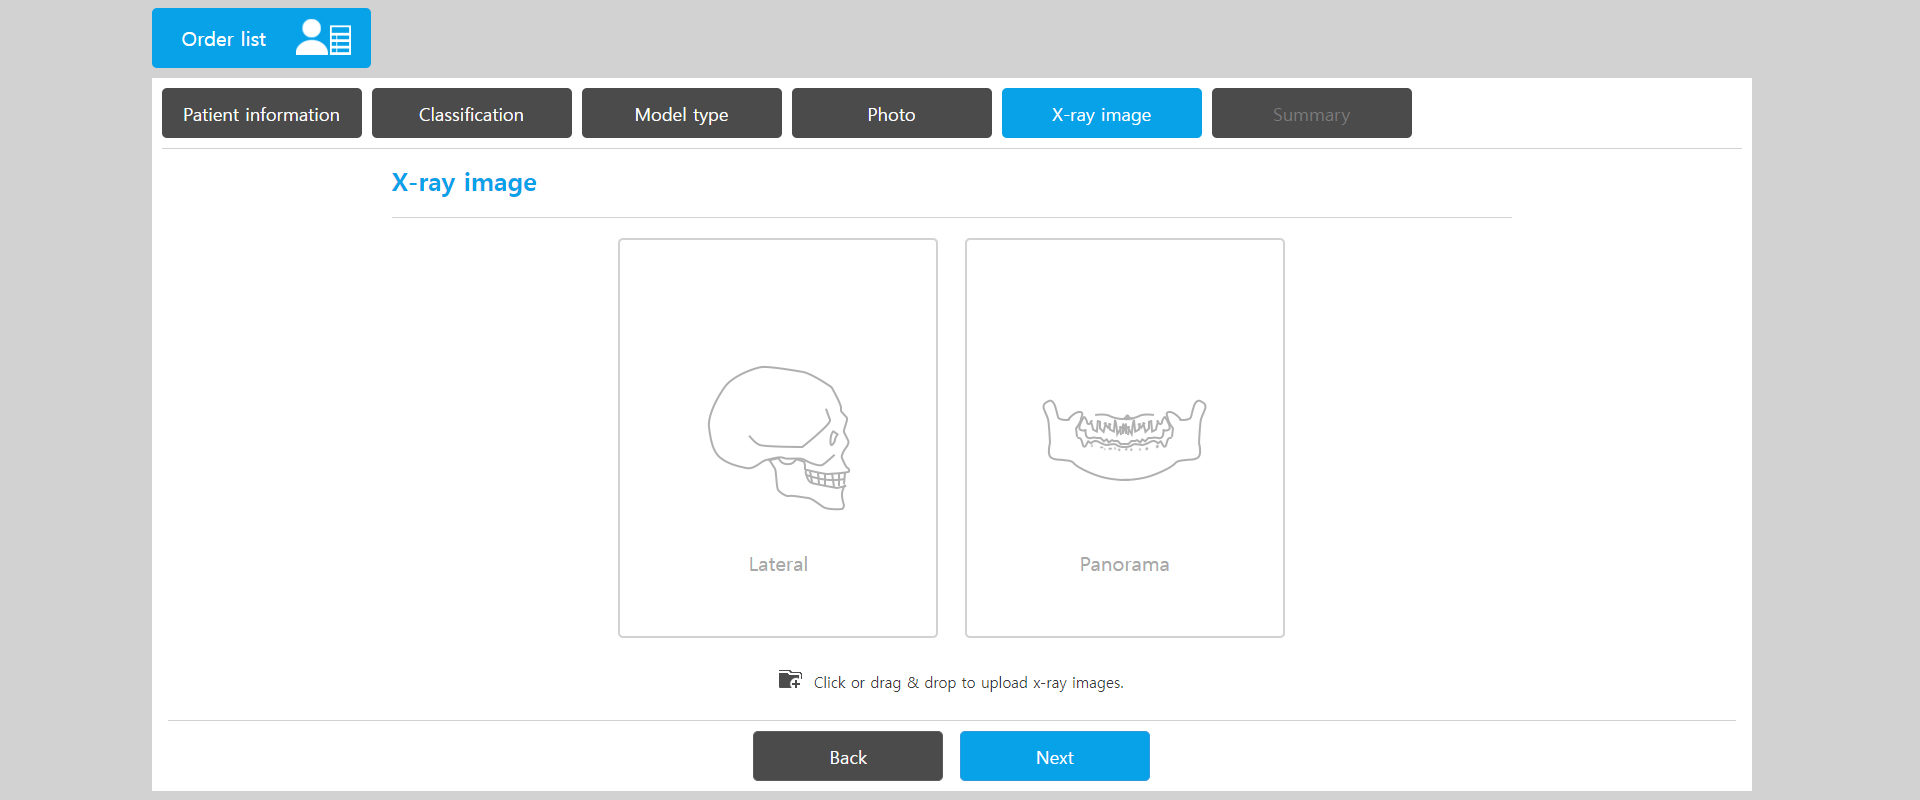
4. 사진
※ 필수 입력 항목은 아닙니다.
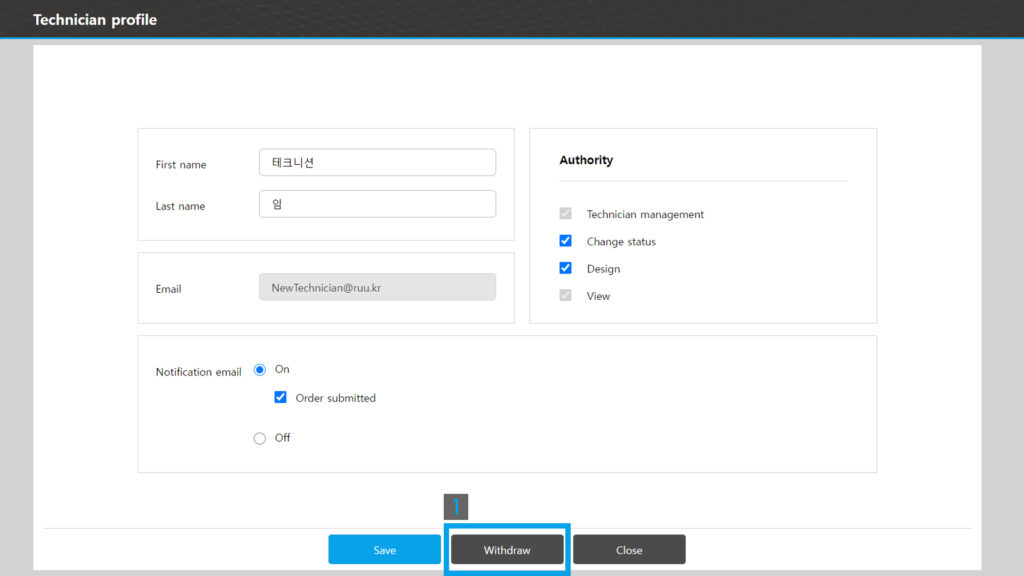
dentOne / clear aligner / 3D Orthodontic Software

※ First Name, Last Name 필수 입력 항목.
※ 필수 입력 항목은 아닙니다.
※ stl, obj, and ply 형식만 업로드 가능.
※ 필수 입력 항목은 아닙니다.
※ 필수 입력 항목은 아닙니다.
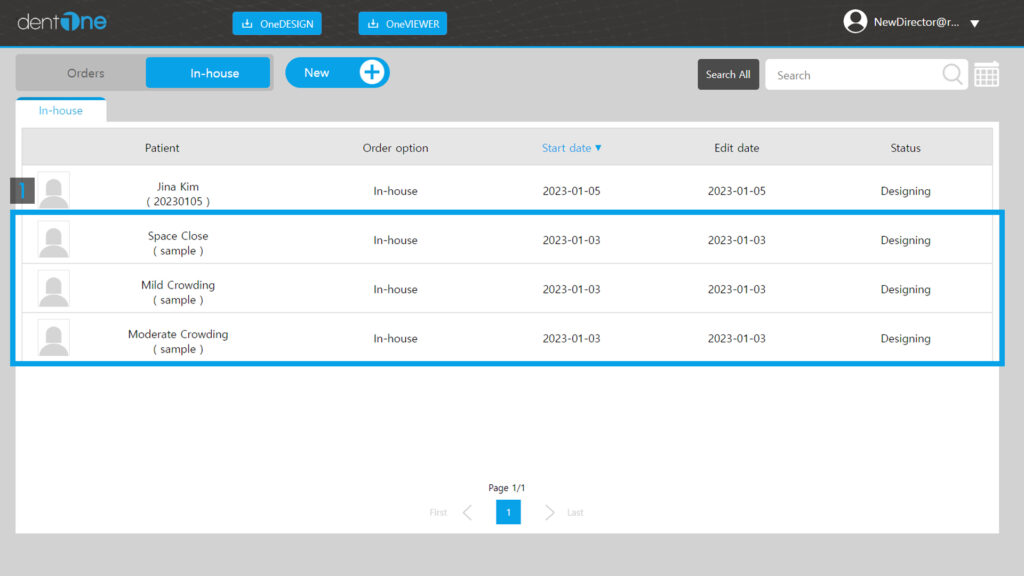
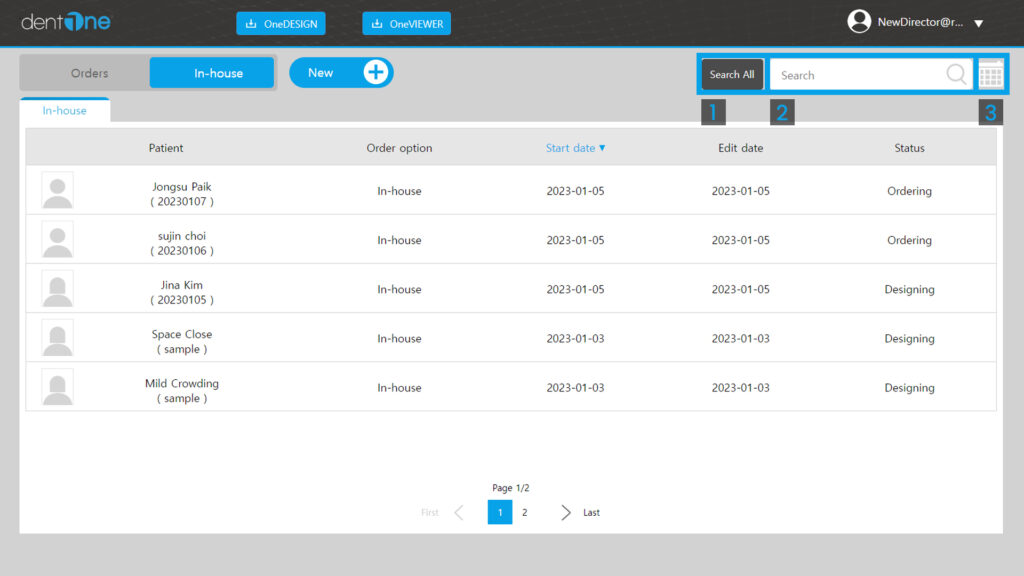
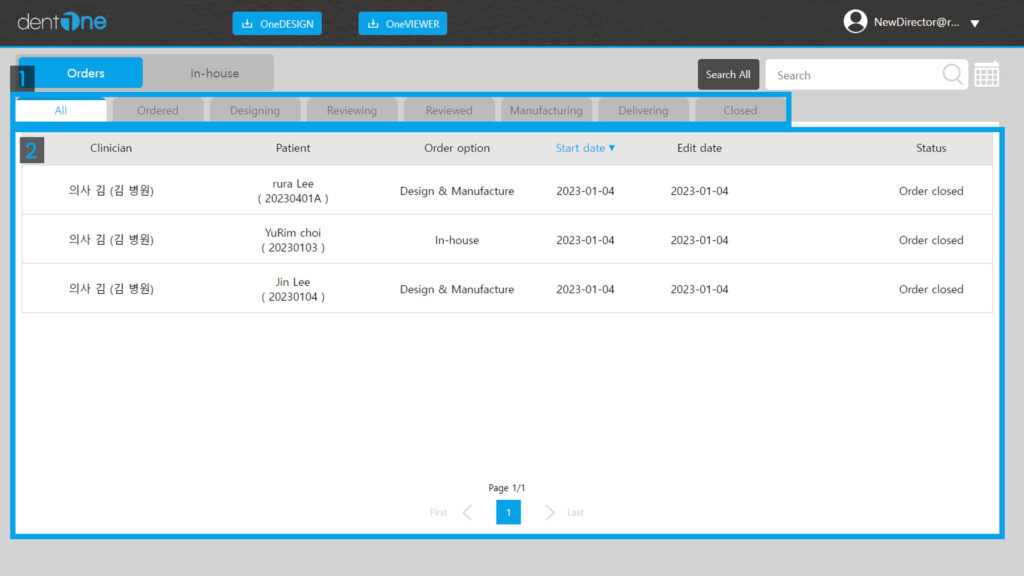
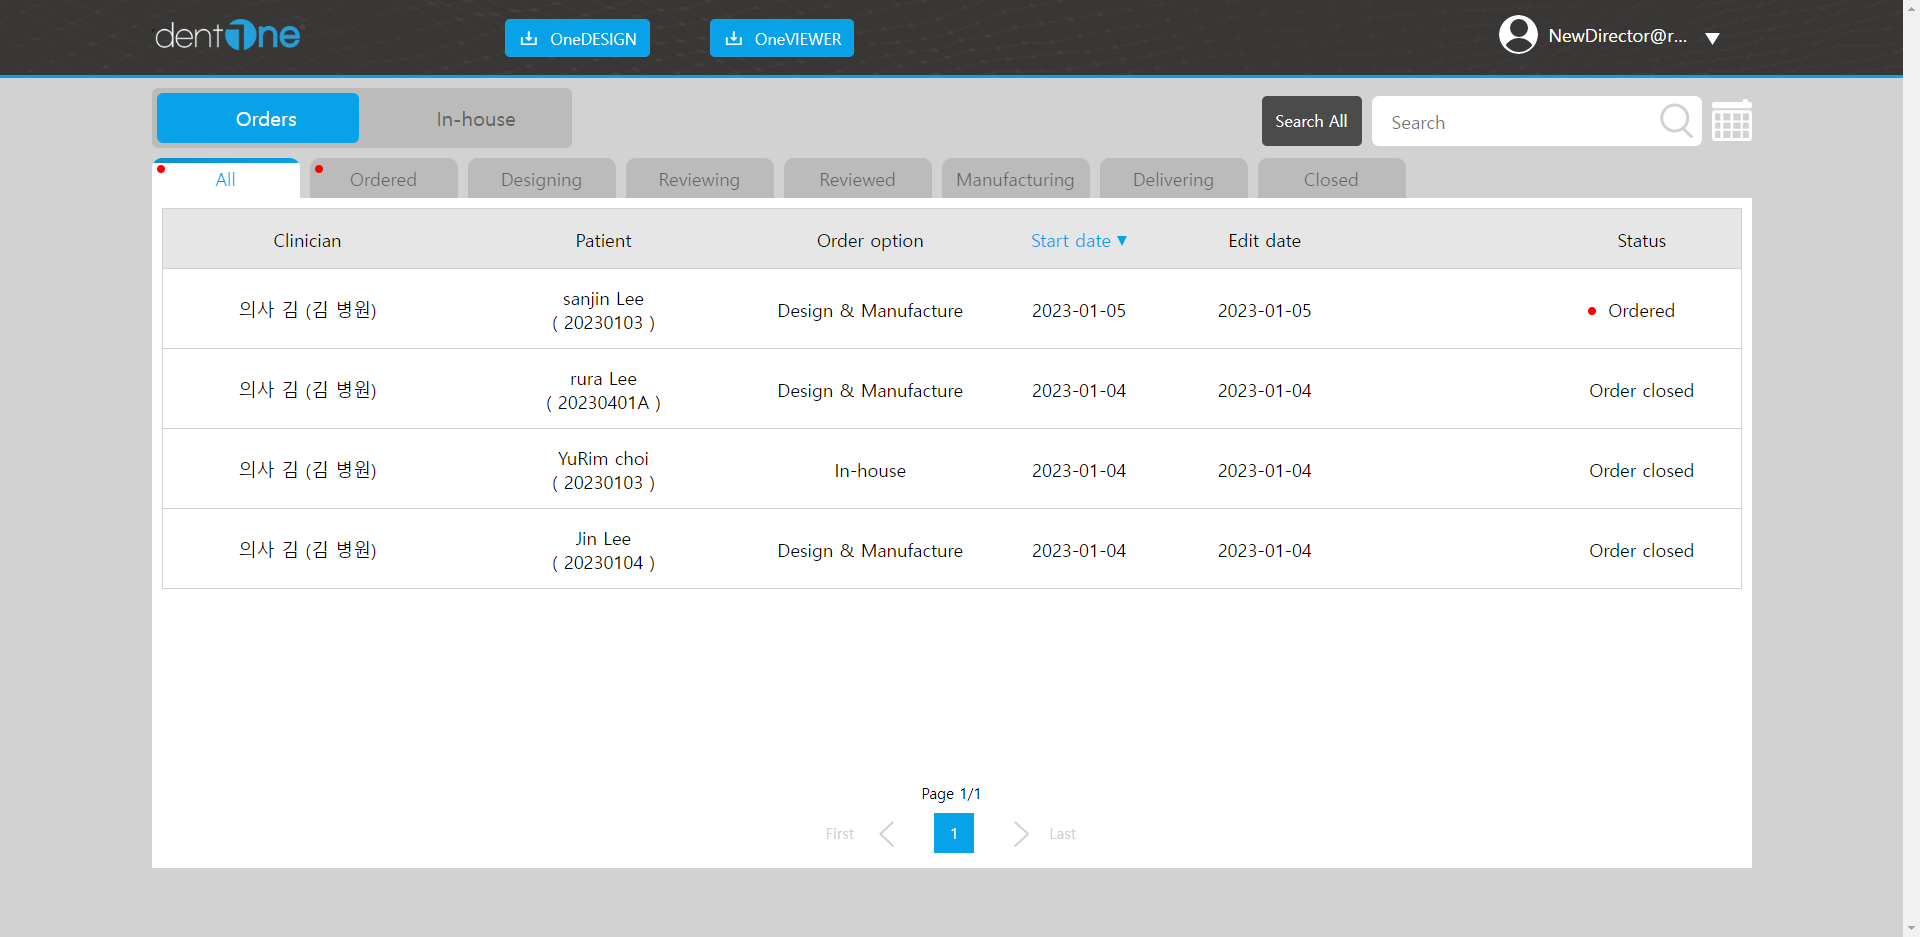
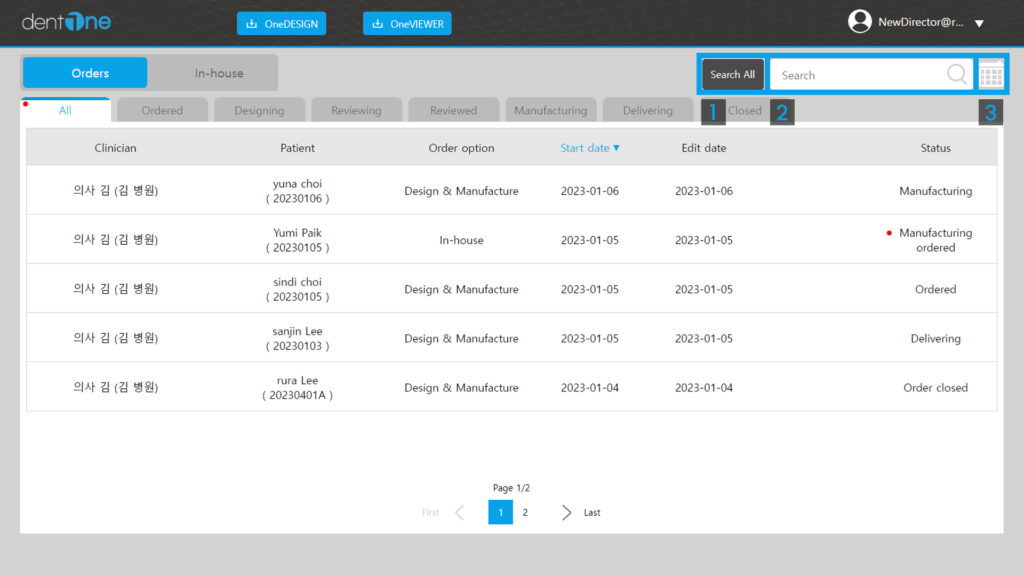
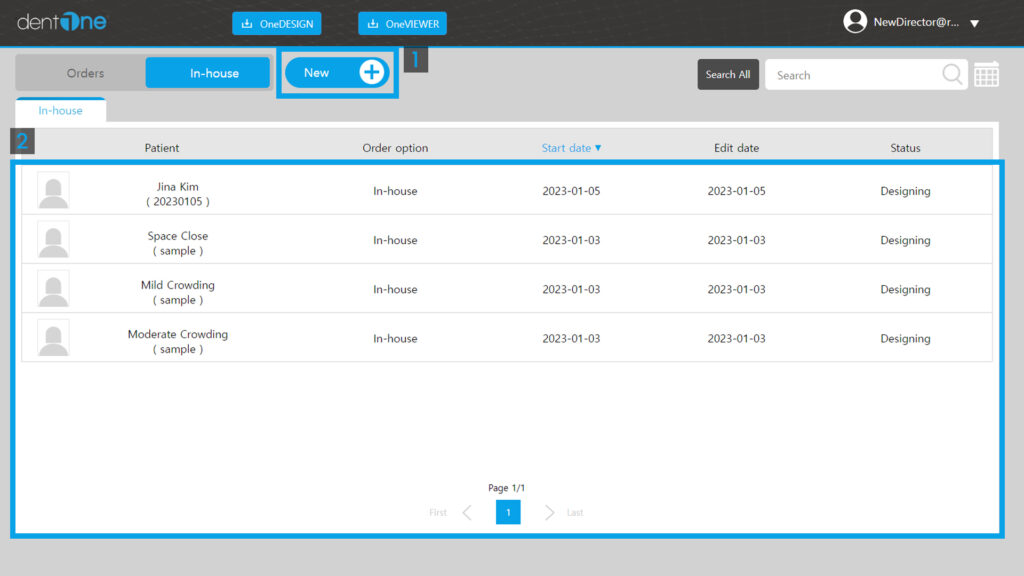
모든 주문 항목이 보여집니다.
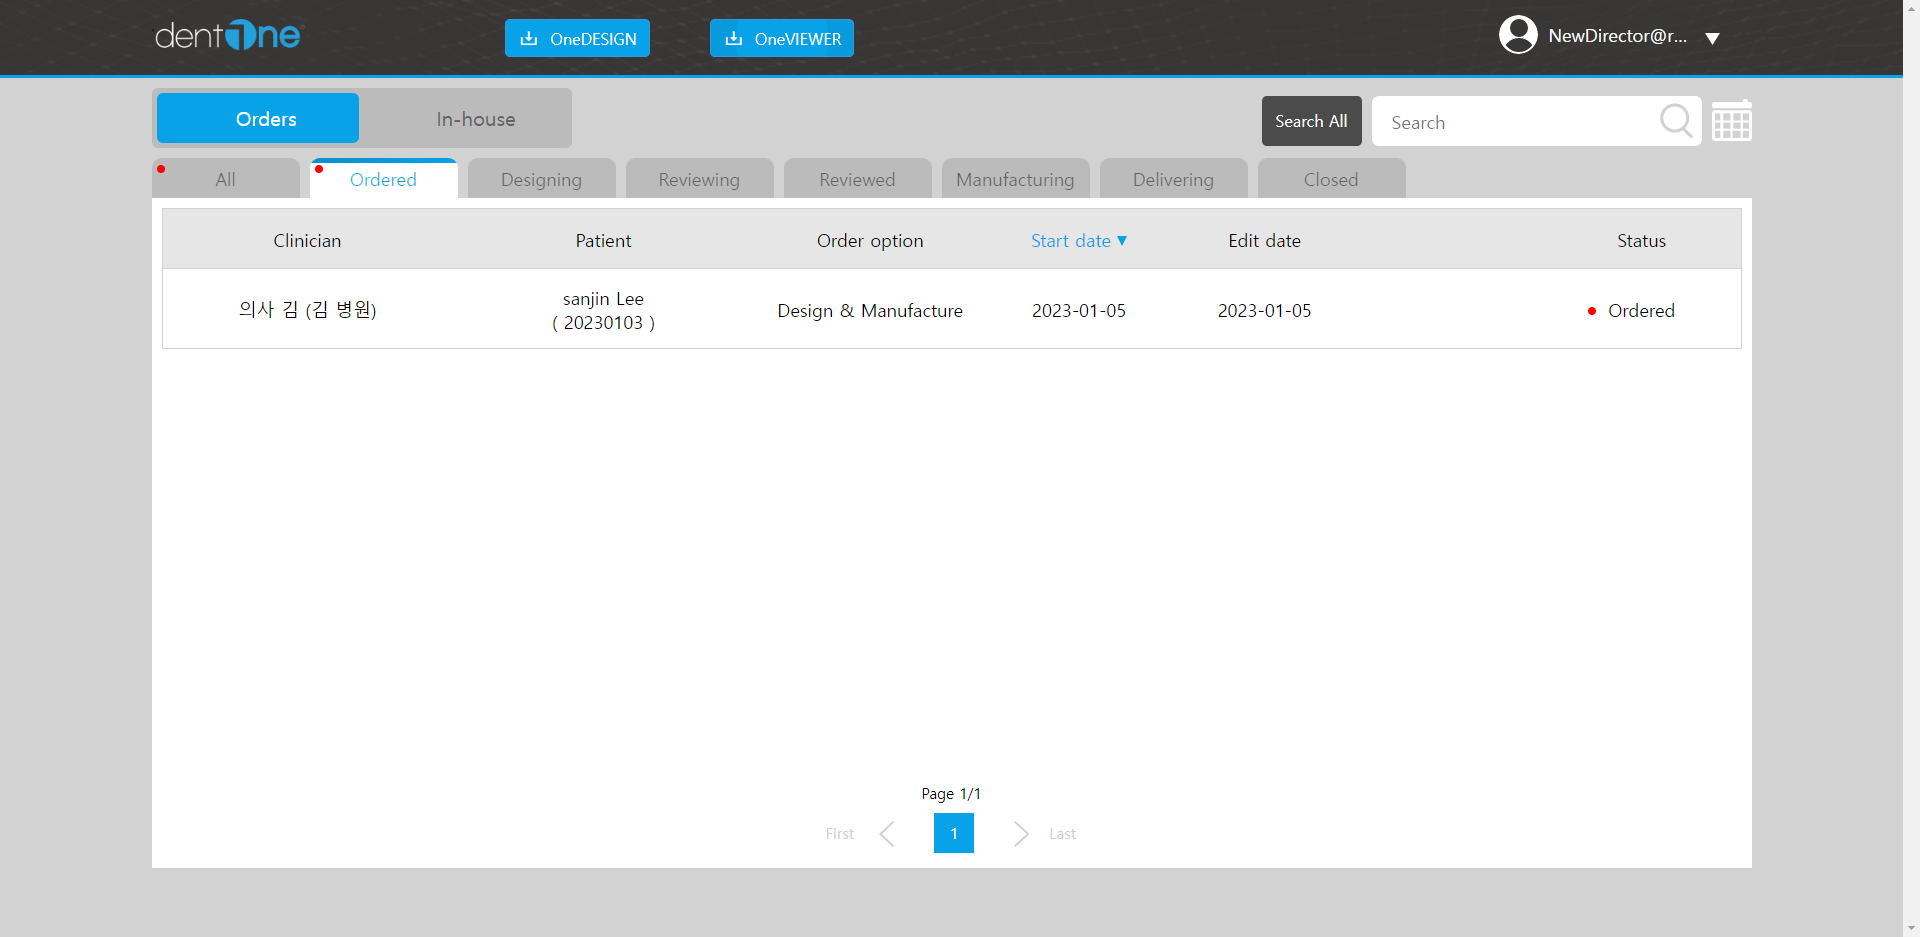
접수된 주문 리스트가 보여집니다.
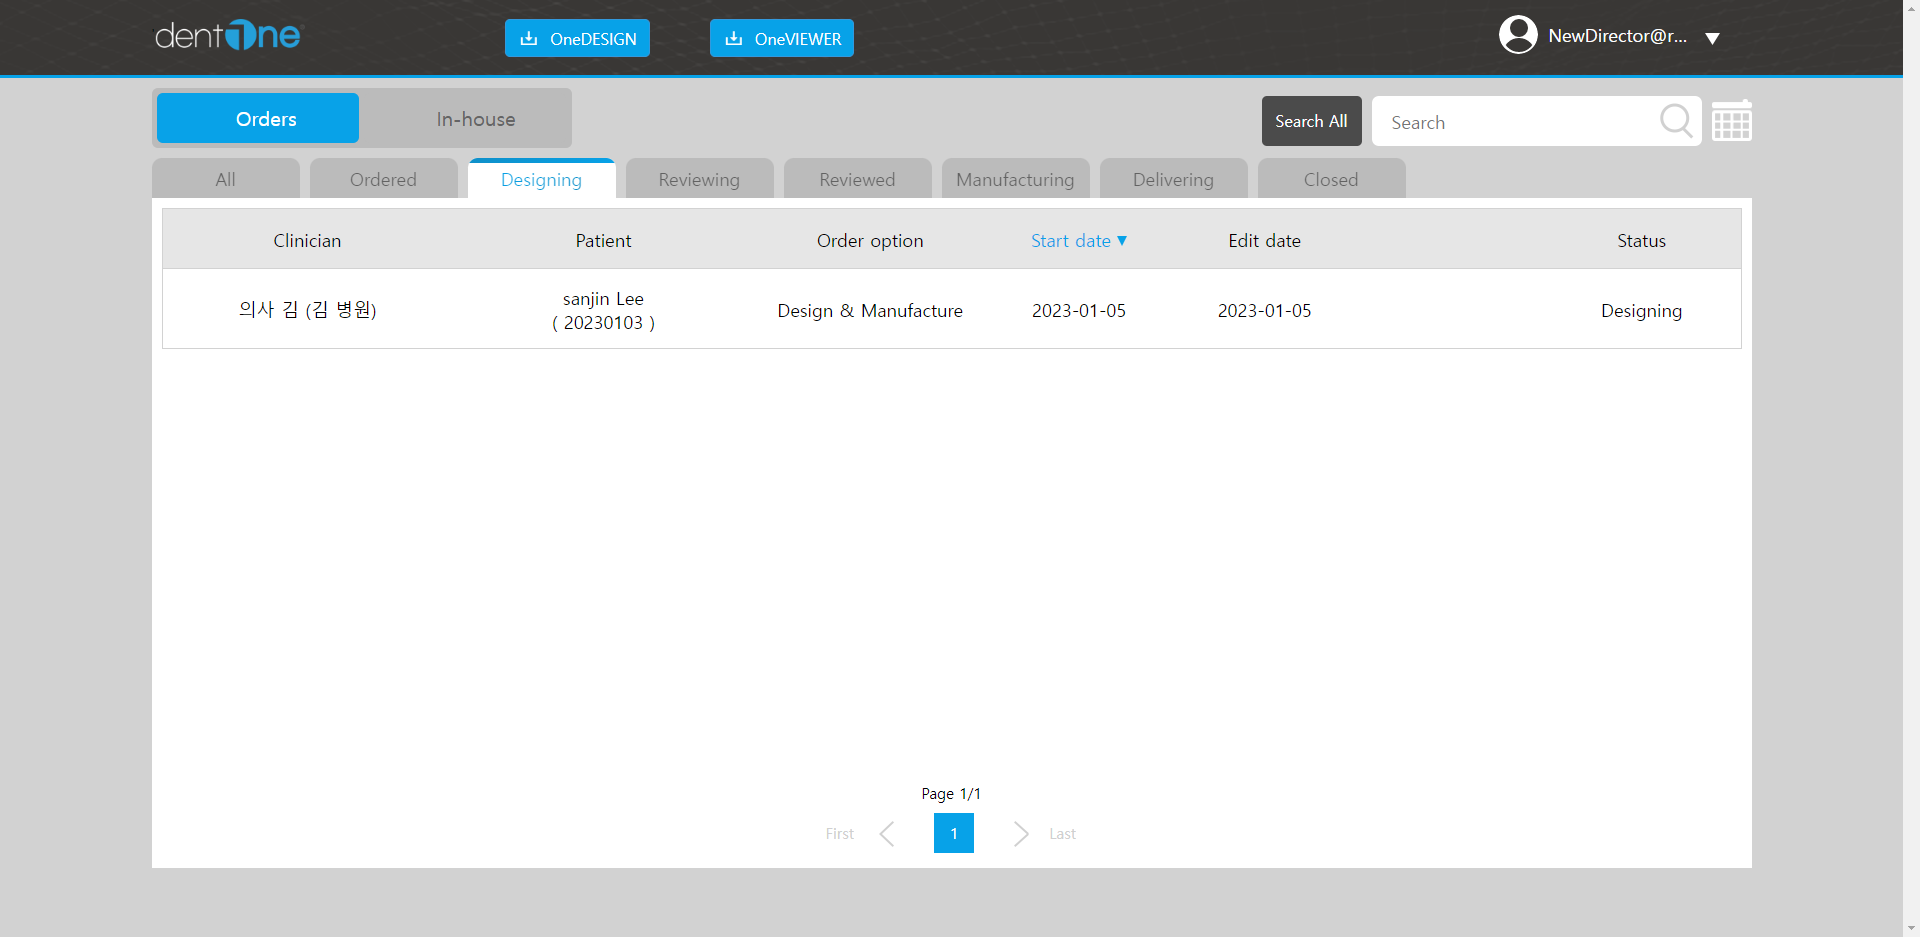
디자인 중인 주문 리스트가 보여집니다.
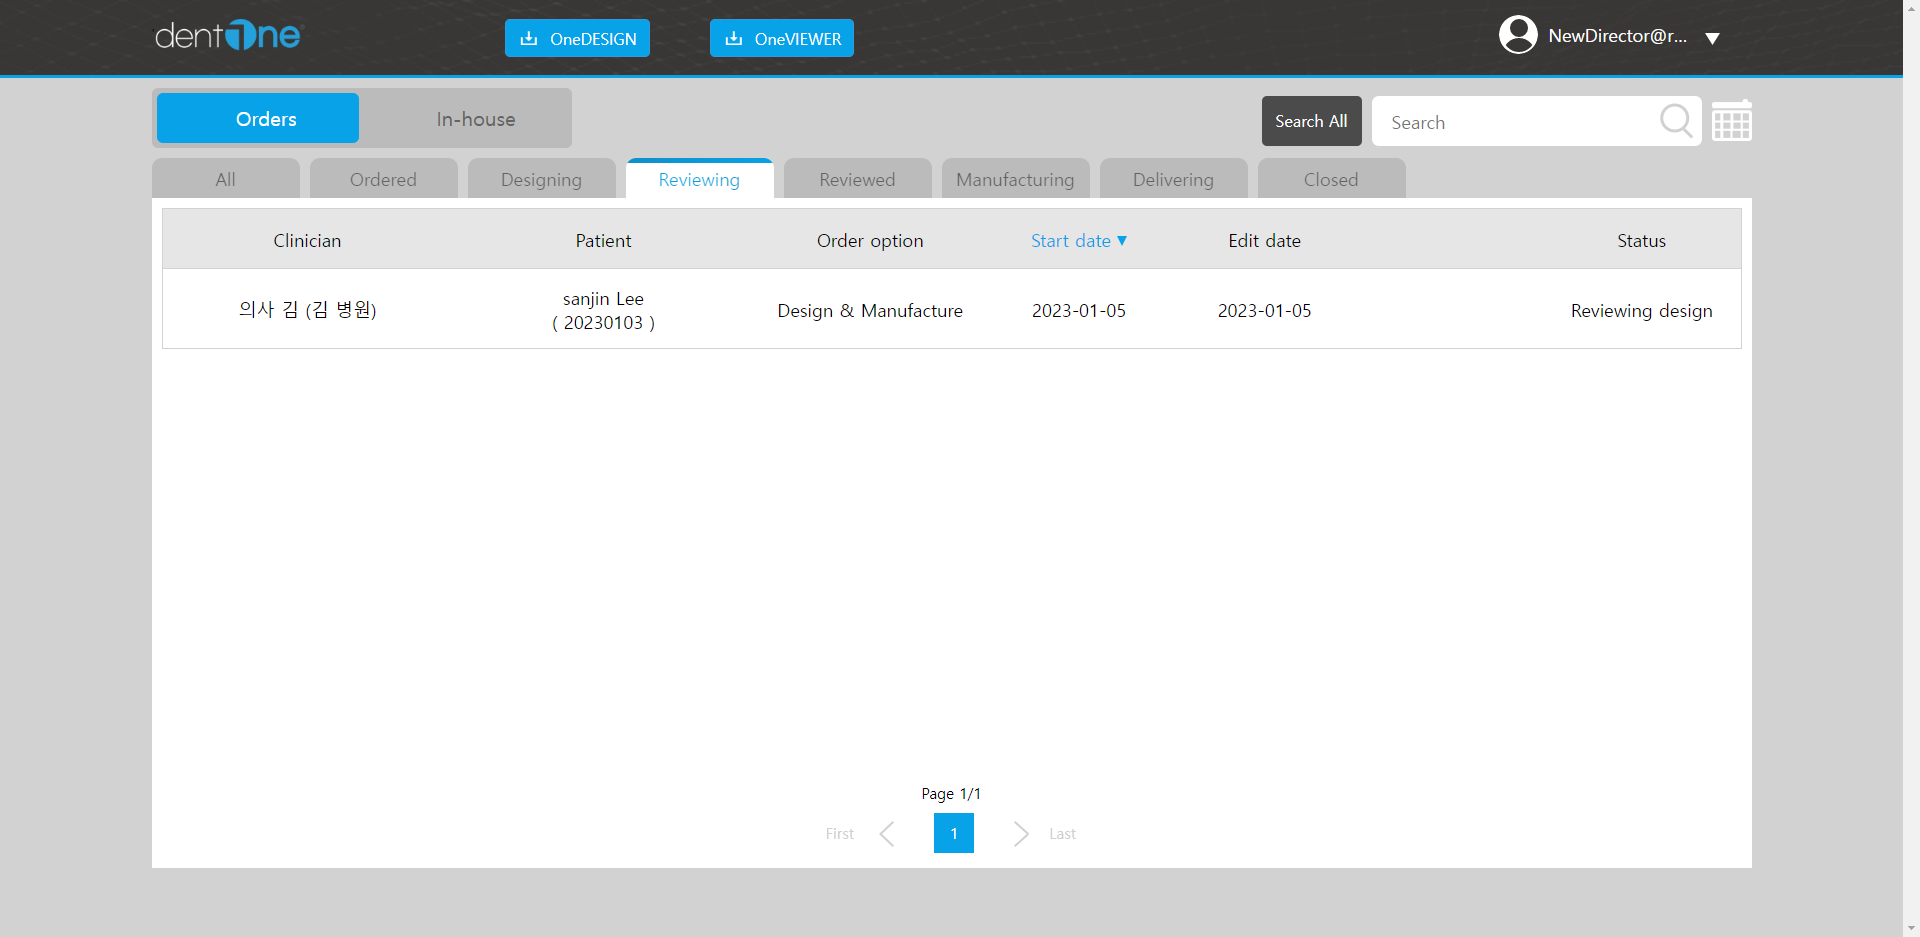
의사가 리뷰 중인 주문 리스트가 보여집니다.
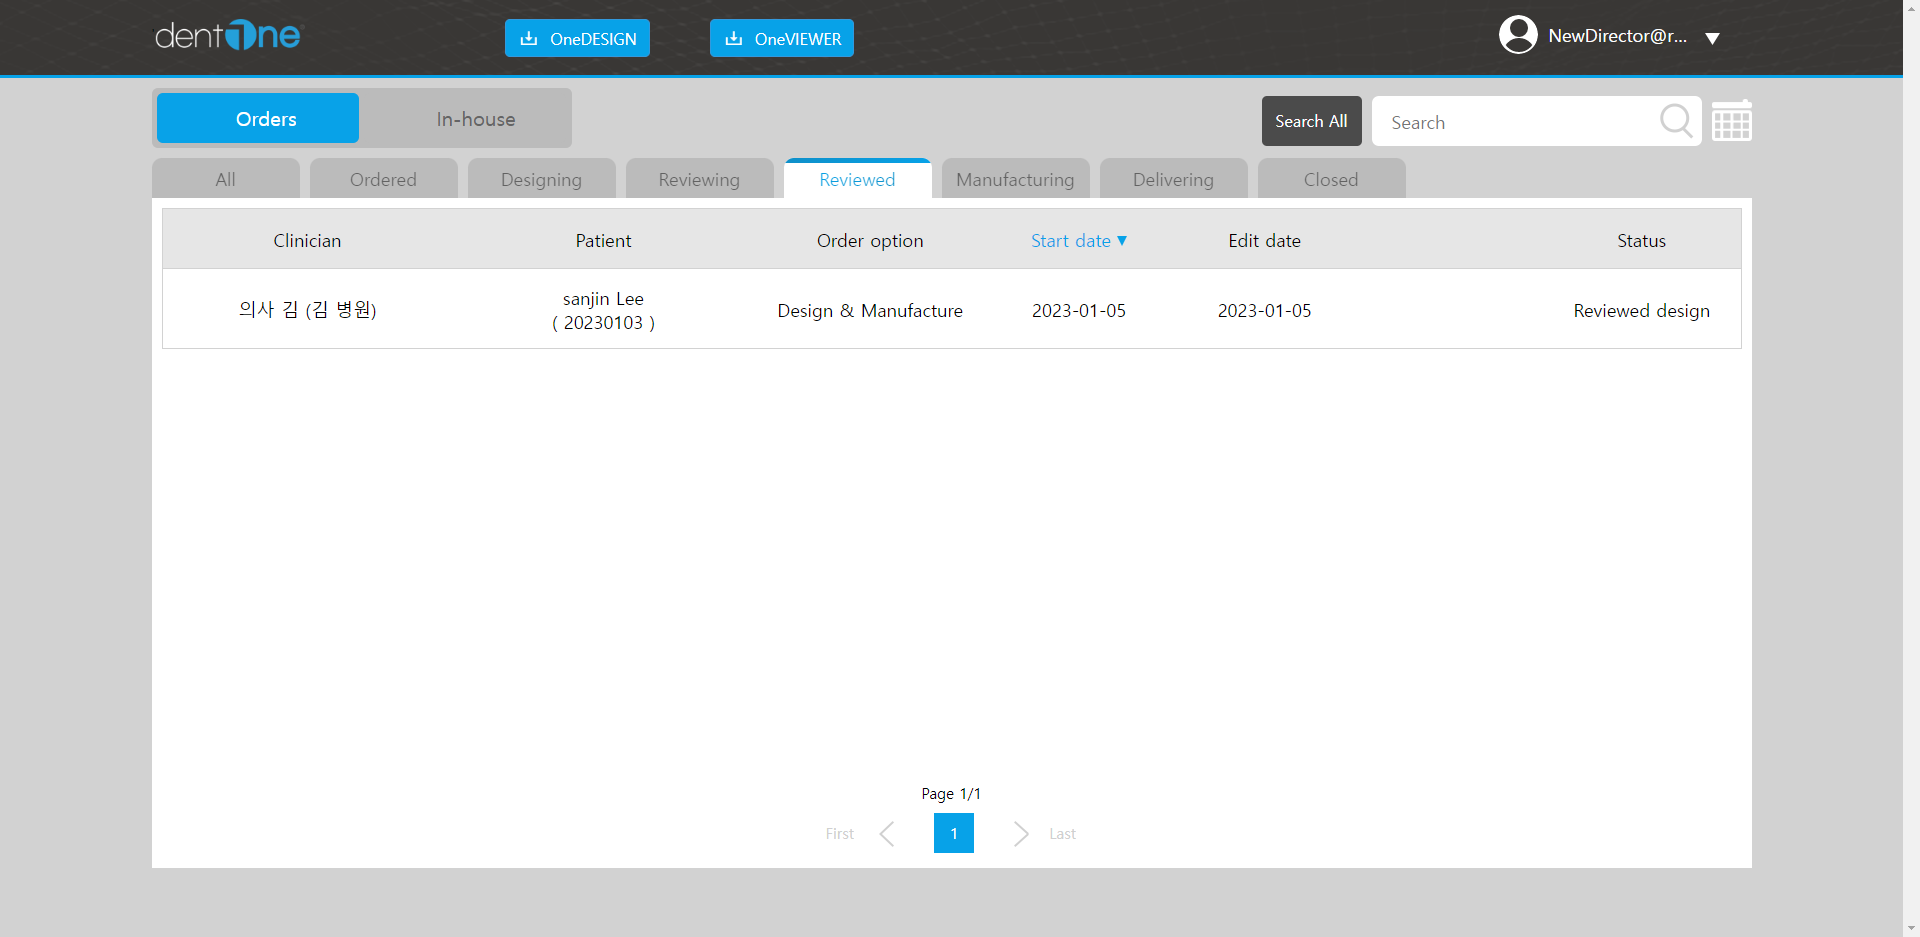
의사가 컨펌한 주문 리스트가 보여집니다.
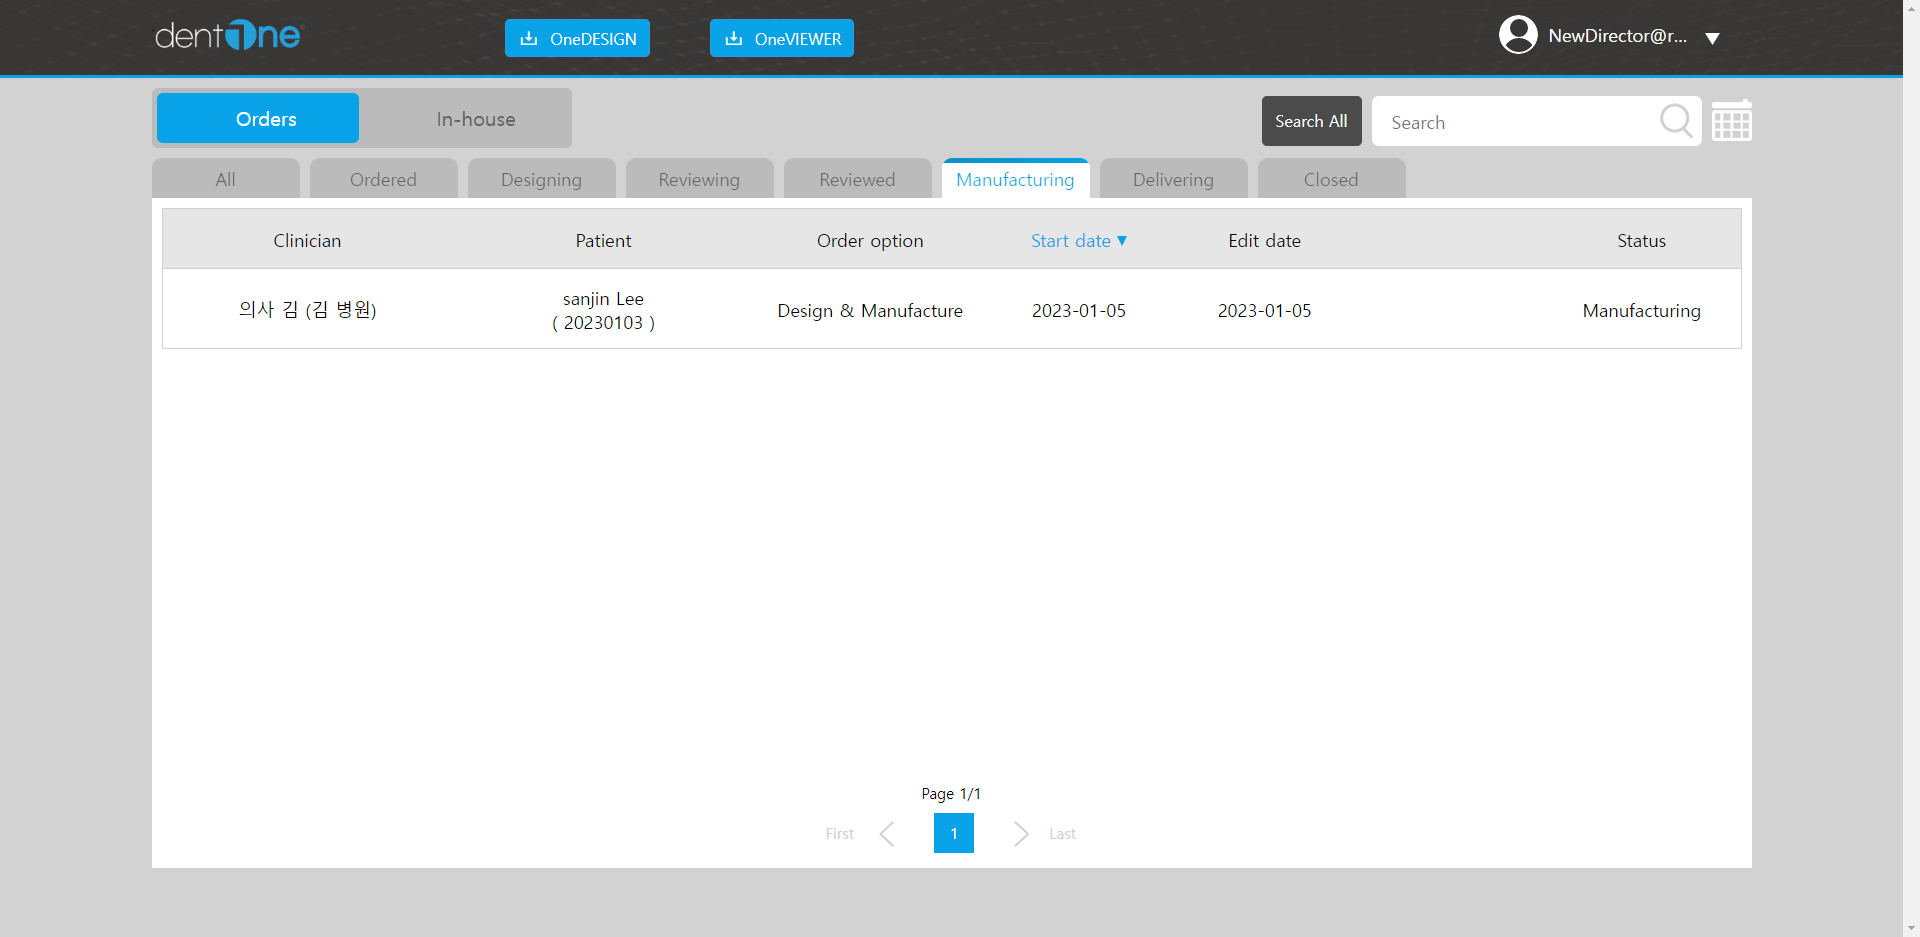
장치 제작중인 주문 리스트가 보여집니다.
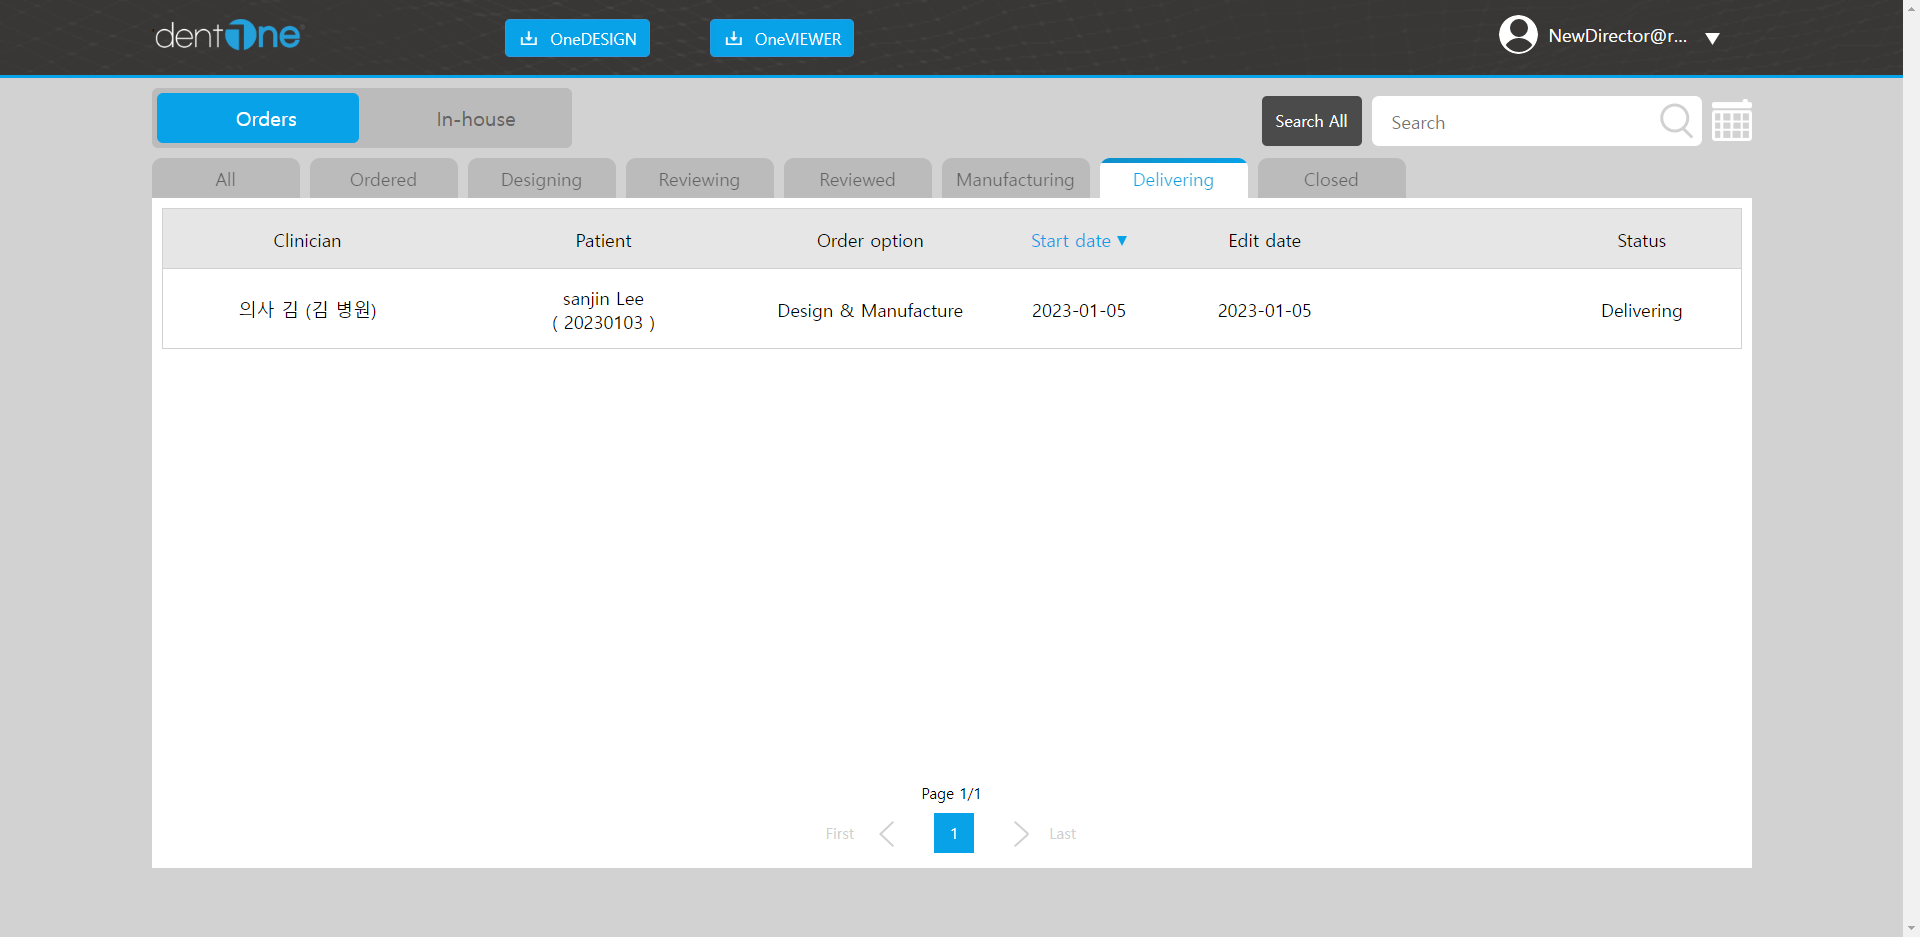
배송 중인 주문 리스트가 보여집니다.
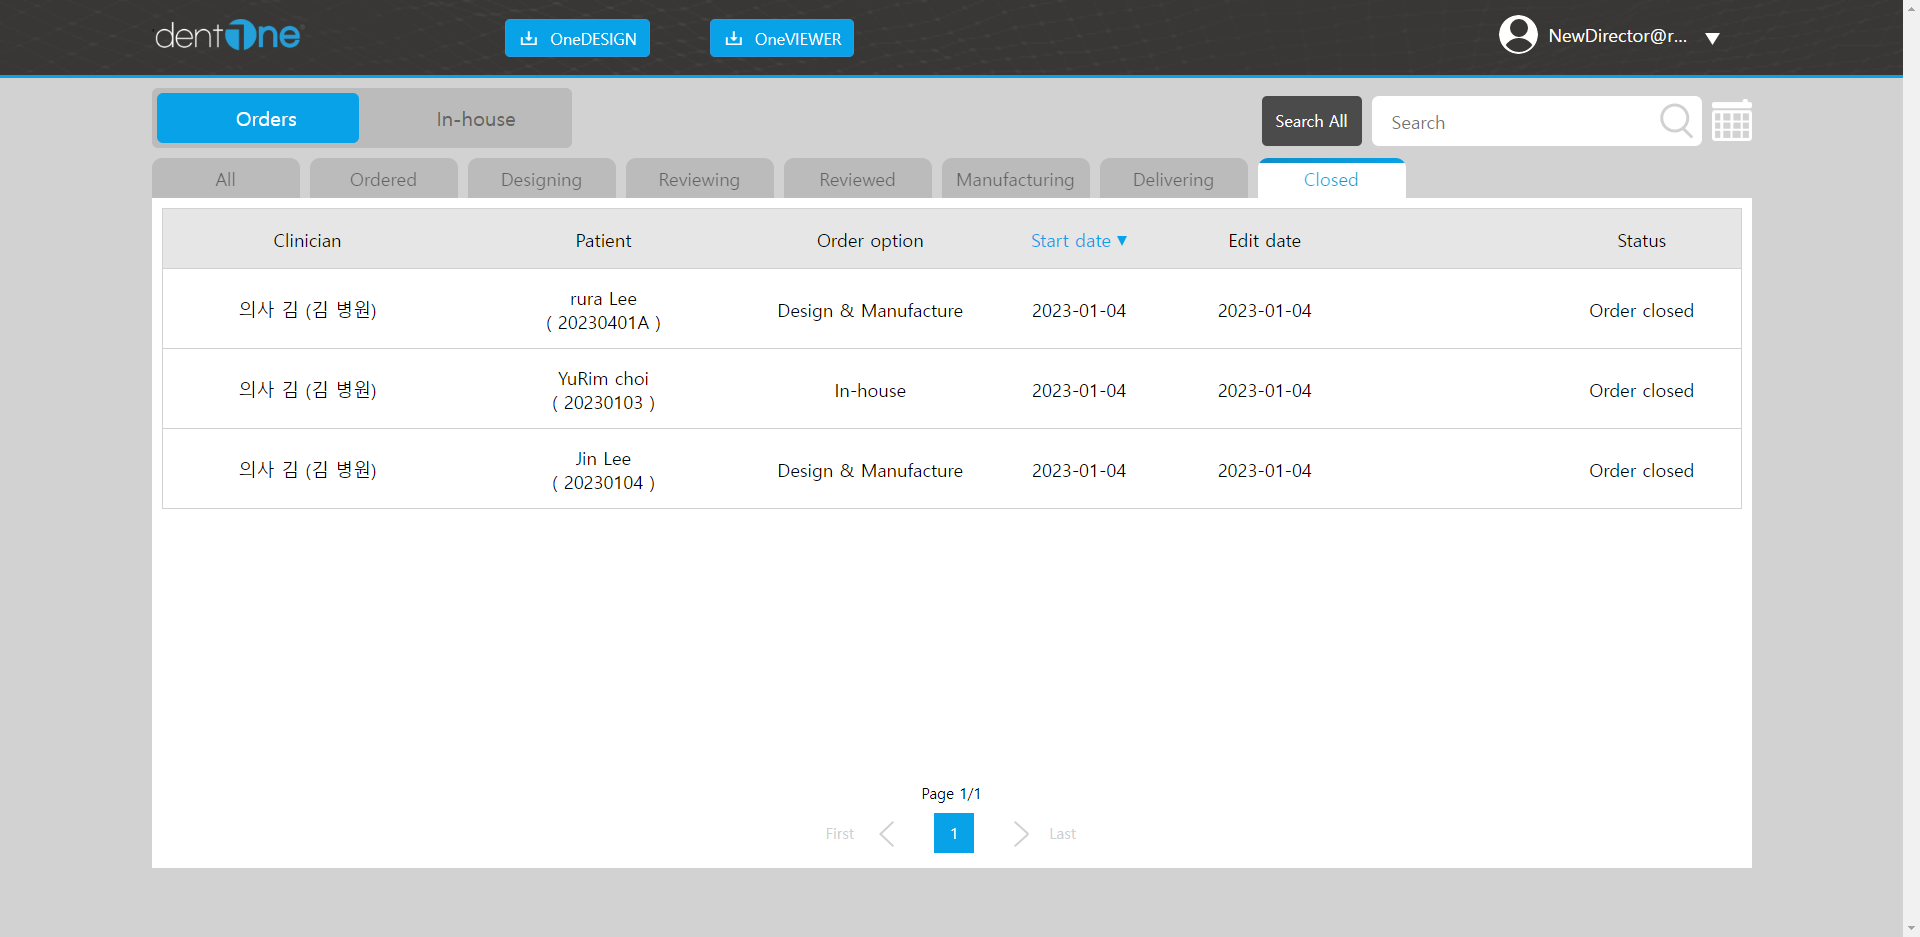
서비스 완료된 주문 리스트가 보여집니다.